")


12. Eye of the Serpent
Version:
2nd revision
Task:
The Mountain Temple: 1/1 base camps
Cenote: 3/3 base camps, 1/1 tombs, 2/2 challenges, 5/5 relics, 8/8 survival caches
- Enter the Mountain Temple
- Find the Inner Stronghold
- Open the Great Gate
- Find the Silver Box of Ix Chel
- Dive into the Cenote
- Find the Silver Box of Ix Chel
- Survive the Ambush
- Find the Silver Box of Ix Chel
- Open the Gate
The Mountain Temple: 1/1 base camps
Cenote: 3/3 base camps, 1/1 tombs, 2/2 challenges, 5/5 relics, 8/8 survival caches
Enter the Mountain Temple
At the beginning Lara earns +50 XP.You can now take the time to fulfil challenges and grab some collectibles, in and around the Market of Paititi, or you can choose to skip them ».
Turn around and head inside Unuratu's house.
Document (7/42):
On the stone ledge on the left wall you can find the document Journal of T. Serrano 3 from the collection "The Missionary" (1/8). You are rewarded with +25 XP. , (map location)
Mission "Hearts and Minds: Retrieve the Kings Horn":
Now get over to Uchu and Jonah further to the right. Speak with Uchu to begin the next mission.
Speak with Kabil
Kabil is located in a hut on the other (western) side of the river, near the fields where you found a mural at a stone wall and the survival cache unter a bridge. Leave the cave again and head down the stairs. Step towards the edge just left of where you came up the rope ladder. Here you will find a rope slide. Take it down. Run down the next set of stairs and cross the bridge. Continue straight and head up the stairs. After you have passed the field on the left and the mural on the right, take the stairs up to the left. When approaching the hut here, Lara will be greeted by a boy. His father, Kabil, is occupied with his sick wife. They ask Lara to go to the market and find their son who was tasked with getting medicine.Go to the market
Before you continue, you can pick up some resources. To the right of their hut you can grab a resource container with +15 XP and on the left is some black powder. Follow the road to the market. By the gate on the left you can find a woman you can talk with. She will tell you, that the boy has been captured by a guard. There is a resource container to the left of her.Located Cualli
Head up the stairs behind you, opposite the entrance to the market.Document (8/42):
On the first landing there is a resource container with +15 XP on the left. Enter the hut where you will not only find some cloth, but also the document Amaru's Grip from the set "Rebellion of Paititi" (4/6) on the bed. You are rewarded with +25 XP and improve your knowledge of Quechua. Leave the hut again. , (map location)
Conversation (Optional):
You can also talk to a woman working with feathers on the right, to learn more about Unuratu's late husband.
Head further up the stairs, on the next landing you will find an alley to the right. Ignore it.
Resource:
Over on the left is a pool of water. Jump into it and dive down to collect a resource container for +15 XP. Over on the right you can find two endurance plants and inside the hut behind them is another resource container with +15 XP.
At the top of the stairs, over on the left, you will find the guard holding the young boy. Talk to him to learn that he has a low opinion of the children of Paititi.
Talk to Yamil
Turn around and run into the passage between the huts just opposite the guard.Conversation (Optional):
In the stall on the right you can find a woman you can talk to. She can tell you more about what happened with the boy. Alternatively you can speak to a man on the left who will tell you a similar story.
You can also talk to the man instead to continue. These two conversations are mutually exclusive.
Continue to the back of the passage where you can find Yamil and three of his friends near a tree with hardwood. Speak with Yamil. He is trying to retrieve a ceremonial knife he took from his Serpent Guard father to show his friends and which was thrown up on a ledge by the guard.
Retrieve the knife
Simply scramble up the cliff wall to the ledge above to find the knife there. Pick it up and you will earn +100 XP.Return the knife to Yamil
Get down and talk to Yamil again. Lara convinces the children to distract the guard.Free Cualli
Once the guard is gone, get to the enclosure to find Cualli and retrieve the herbs from him.Return to Kabil
Head down the stairs again and when you reach the market gate at the bottom, turn left. Run across the wooden walkway and turn left to return to Kabil. Lara will be given the horn.Return to Unuratu's hideout with the King's Horn
Head down to the river and cross the wooden bridge again. Find one of the paths back up to Unuratu's hideout, where you speak to Uchu again. You are rewarded with +350 gold pieces.Mission "Hearts and Minds: Retrieve the Savior's Amulet":
With the first part of Hearts and Minds done, Uchu has another mission for Lara. Find out what happened to Quenti who went to the old cistern to search for Manko's amulet.
Find the White Tree
Leave Unuratu's house once again and make your way down to the river. Cross the wooden bridge again. This time make your way over to the right (north) when arriving on the other side of the river.Resource:
Inside the first hut on the right - the entrance is on the side facing the fields - you can find some medicine and a resource container with +15 XP.
By the second hut, between the stone wall and the hut, behind the tree, you can find another resource container with +15 XP and inside the hut is more medicine.
Conversation (Optional):
You can choose to talk to the woman working on the boat, who reveals that Amaru feels guilt for his brother's death.
Conversation (Optional):
The young girl fishing the the shallows will tell you a short fishing story.
Monolith (2/7) Mam (green):
You will obtain +10 XP for discovering the next monolith on the small island behind the girl. Get over there and decipher it to receive another +25 XP and the clue: The waters below protect me from the waters above.
Resource:
Inside the lake you can collect a variety of aquatic plants as well as a resource container with +15 XP by some wood near the right cliff wall halfway to the waterfall.
Monolith Riches Survival Cache (8/34):
Swim to the waterfall at the far northern end of the stream. Dive down to the ground. On the cliff wall slightly to the right you will find a vein with jade ore and behind the waterfall, on the ledge you can collect a pile of jade ore. A couple of stokes away from the cliff wall, back towards the lake, you will find the monolith riches buried on the lake's floor. You will obtain +50 XP. After collecting it return to the area around the two small islands. , (map location)
Make your way to the western shore. Here you will discover the base camp Fishing District (6/11) and earn
+25 XP. There is a resource container with +15 XP.
Slightly to the left is the white tree we are looking for.
Survival Cache (9/34):
But before we climb it, let's take a short detour to the elevated level above the stone wall to the left of it. Jump up there to dig up the next survival cache buried there and obtain +25 XP. , (map location)
Conversation - Point of Interst (15):
Just a few steps further along this ledge is a man you can talk with, who will point you to a wolf den to the west. , (wolf den map location) And on the left side you can find a resource container with +15 XP. Afterwards return to the white tree by the camp.
Jump up at the tree bark to reach the handhold, then jump again to be able to pull onto the branch. From here jump towards the ledges in the cliff wall and climb up. Run over to the right end and from there jump towards the next handholds. Perform a saving grab, then, from the right end of the ledge, scramble up the wall. Traverse along the ledge to the right and pull up.
Challenge "Keep Calm and Carrion" (3/3):
At the top you will find the final Condor feathers for the challenge "Keep Calm and Carrion". You are rewarded with +100 XP. Glitch Note: When your inventory is full with condor feathers, it might look like Lara collects them but the challenge is not completed. To fix the problem, reload your last checkpoint, get down to the market, sell some condor feathers to make room and return. This worked fine for me. If you run into a serious bug, you have hopefully saved your game on a regular basis, and can try again from a savegame. , , (map location)
Step out onto the protruding rock and from there jump to the thin tree branch which Lara will use to swing to the ledge in the next cliff wall. Scramble up the wall to pull up to the top.
Enter the cave
Collect the resource container with +15 XP in the right corner.Document (9/42):
Over on the left side, on a stone block, you can find the next The First Emperor from the set "Founding Paititi" (4/7). You are rewarded with +25 XP and improve your knowledge of Quechua. , (map location)
Crypt (1/5) "Manko, the Peasant Savior":
Now get to the opening in the wall and scramble up the wall to get into it. Squeeze through the gap. In the dark tunnel, duck under the spear trap and then jump over the spike pit.
Swim to the ledge ahead that will lead to the remains of Manko. Open the Sarcophagus and obtain The Savior's Amulet, of which Lara add a photograph to the collection "Subjugating Paititi" (4/8) which will improve Lara's knowledge of Quechua. She will also receive +750 gold pieces for opening the sarcophagus.
Hop down. Step towards the opening in the fence in front and then dive down into the lake below. Swim over to the right, passing the small island with the monolith to your right.
Document (10/42):
On a stone slab on the right, by the burning chalice, you will find another document, this one titled The Cult's Control from the collection "Subjugating Paititi" (2/8). Again you are rewarded with +25 XP. Just to the left of the burning chalice you can find a resource container with +15 XP. , (map location)
Follow the tunnel up and duck under the spears.
Mural (6/23):
At the far wall, in the niche, you will find the mural The Peasant Savior from the set "Subjugating Paititi" (3/8) which will reward you with +35 XP and improve your knowledge of Quechua. , (map location)
Now find the weak wall on the left and use the axe to break through it to enter the cave.
Search for Manko's remains
Carefully follow the dark tunnel until you come to a trip wire. Cut the tripwire to deactivate the spear trap. Roll underneath and immediately cut the next wtitem="obstacle">tripwire for the second spear trap. Duck through to the other side to reach a chamber.Relic (11/28):
On a stone ledge on the right you will find a small box with the relic Golden Effigy. It will improve your knowledge of Quechua and reward you with +25 XP. , (map location)
Document (11/42):
Over on the left side you will find the document Protection from the collection "The Resistance" (1/9). You are rewarded with +25 XP and improve your knowledge of Quechua. , (map location)
Just to the right of the document is an opening up in the wall. Scramble up there and climb in. Follow the low tunnel into the next chamber.
Resource:
On the right you can get through a low opening and in the next chamber belly-crawl under the opening on the right. Collect the pile of gold ore. Return to the first chamber.
Take the dark tunnel all the way down to find Manko's resting place.
When you step out onto the wooden walkway, it will collapse and Lara will fall into the water below.
Reach Manko's remains
Dive down to the ground and collect two focus plants.Water Level (1)
Then dive into the tunnel in the north-west. Dive up the shaft at the end and climb out into the chamber. Directly in front of you is an optional mural about Manko. Get into the chamber to the left. On the right side is a wall lever. Push it, to close the flood gate and get the water level to rise. Dive outside, first through the spike gate, then through the ornate opening. Rise up to the surface.Water Level (2)
Swim into the passage on the southern side. On the left is another optional mural about Manko. On the right wall you will find the next wall lever regulating the water level. Pull it then dive back outside and resurface.Water Level (3)
Swim into the next passage to the west. There is another optional mural on the right. Use a rope arrow to tear down the barrier at the back. Step through and activate the wall lever on the right. Dive into the previous chamber and here dive up the shaft. Follow the passage to a pry barrier and tear it down, using the axe. Squeeze through the gap and quickly swim to the surface.Swim to the ledge ahead that will lead to the remains of Manko. Open the Sarcophagus and obtain The Savior's Amulet, of which Lara add a photograph to the collection "Subjugating Paititi" (4/8) which will improve Lara's knowledge of Quechua. She will also receive +750 gold pieces for opening the sarcophagus.
Return to Unuratu's hideout with the Savior's Amulet
Collect the piles of jade ore left and right of the sarcophagus. Break through the weak wall behind the sarcophagus. Step through and turn right to face the craggy wall. Jump over there and attach the axe. Climb up. Pull up onto the ledge at the top. Follow the tunnel outside and run up to reach the next craggy wall. Jump onto it and rappel down. You are back at the mural in the entrance passage. Crouch under the spears to continue. Follow the tunnel and after the small chamber with the burning chalice, jump over the spike pit. Duck under the next set of spears and squeeze through the gap to return outside.Resource:
Swim into the opening in the cliff wall on the left. Here you can grab another resource container with +15 XP.
Follow the stairs up the hill, passing the ledge where you grabbed a map from an Explorer Backpack and a document earlier. Climb up the rope ladder to get back up to the plateau below Unuratu's home. Take the stairs back up and return to Uchu. Speak with him to finish this mission. You will receive gold pieces and the trophy/achievement Hearts and Mind.
Now it's time to continue with the story.
Head down the stairs from Unuratu's home.
Turn right (north) and pass through the stone arch to reach the rice fields.
Resource:
In the left corner down on the first level you can find a resource container with +15 XP.
🔧
Challenge "High Diving" (2/4):
On the next level, on the left end, you can find a braided rope barrier you can cut using the reinforced knife. If you perform a swan dive here, you will receive another +10 XP for furthering the challenge "High Diving". Take the way back up just like you did a little earlier. I might decide to add this at a later date in the future, but for now I am mentioning it here.
Travelling Merchant:
You might also find the travelling merchant in a hut on the left side on the third level of the rice fields. You can sell her all your gold and jade ore and with the money earned you can buy the Ascender if you didn't get it yet or any other gear item you like. From now on I will assume that you own the ascender. , (map location)
Relic (12/28):
Get up to the fourth terrace of the rice fields and run to the hut on the left. If stepping under the roof behind it, you will discover a small box with the relic Plastic Penguin from the collection "Myth, Magic & Monsters" (6/8). You are rewarded with +25 XP. , (map location)
Follow the stone steps up and you will come past a tower on the right where there is another resource container with +15 XP.
Take the stairs to the top.
Relic (13/28):
Head over to the left, where you will find another small box in front of a tower. Open it to retrieve the Urpu from the collection "Day in the Life of the Inca" (5/6). You will obtain +25 XP and improve your knowledge of Quechua. , (map location)
Monolith (3/7) Mam (green):
Just to the left of the relic you can find the next monolith. You will obtain +10 XP for discovering it and +25 XP for deciphering it. The hint reads: The youngest of four turns his back on his brothers, unable to speak as I lie in his mouth.
Monolith Riches Survival Cache (8/34):
The four brothers are the four towers in the rice field and the youngest it the one at the bottom. So return to the lower levels and get to the tower on the left. From below get behind it to find the monolith riches buried in the mud just in front of the mouth of the tower. You will obtain +50 XP. , , (map location) Afterwards get back to the top of the rice fields.
Scramble up the wall to the right of the relic box and the monolith to reach the entrance to the mines.
The Mountain Temple
Find the Inner Stronghold
Make your way into the mountain temple. Step out onto the wooden walkway and jump over to the craggy wall. Attach the axe and rappel down. At the lower end of the rope, drop down. You can collect medicine, fat and cloth in the chamber where you land. When getting to the second room, Lara will take out her gear which she wore concealed while in Paititi. Over in the right corner you can find a resource container rewarding you with an additional +15 XP. Jump up at the wall on the left end to climb out to the mountain temple. Balance across the beam to the next ledge where you can find hardwood. From the left end jump over to the next platform to grab the wooden beam there. It will break and send Lara down to the stone handholds below. Traverse around to the right and at the end jump to the wooden walkway. Step forward to discover the base camp The Mountain Temple (1/1) and earn +25 XP, while listening to what Jonah has to say. If you have the skill points to spare, I recommend you get "Serpent's Fury" from the Scavenger Skills, which allows you to chain two melee stealth kills, and might come in handy during the next combat encounter.Resource:
Near the edge of the abyss on the left you can pick up some gold ore. Inside the building on the right you can find more gold ore besides hardwood and a resource container which will also give you +15 XP.
Now get down to the lower level on the left side of the building. Scramble up the wall and jump over to the wooden walkway on the left. From here jump towards the rope slide to reach the platform below.
Two cultists appear on the other end of the room. They are oblivious to Lara's presence. Wait for the right one to leave then sneak up on the left one and stealth kill him with a melee attack. Make your way up the stairs to the right to where the other guy disappeared. Duck through the narrow tunnel. Quickly hide behind the low wall.
There are two cultists here. On the wall you can pick up a can which you may use to craft a smoke bomb. Under the cover of smoke you can take out the two relatively easy.
Once they are dealt with, collect the fat, then exit the chamber on the other side. Squeeze through the gap. Here you can collect some hardwood and medicine. Then continue to the right.
Open the Great Gate
Combat
Quickly move into the passage on the right, where you can find a patch of mud, where you can cover Lara in mud. This will help with hiding in mud walls. Try to lure enemies to your hiding place by carefully making a little noise. If you've followed my advice to unlock the skill Serpent's Fury, you may get the chance to use it here, if two cultists get close to your hiding spot. Since the cultists all wear head gear, forget about the silent arrow to the head tactics. But Lure Arrows are a great option, if you have them. Shoot them somewhere close to a group of enemies to lure them into a gas trap. There are also a couple of vases with explosive content around, which you can use to rid yourself of cultists standing close to them. If you've been made, I recommend switching to the rifle for some firepower. Once you have killed all enemies, loot them and search the area for other resources.Make your way over to the gate and scramble up the wooden lattice on the right. Climb the ledges and jump up the next wall.
Lara uses the large wheel to open the gate and let Unuratu and her rebels. Lara herself will then use the silver key to open the next gate. Before she can leave, she witnesses that during Etzli's rescue, Unuratu is captured.
Find the Silver Box of Ix Chel
After speaking with Jonah over the radio, squeeze through the gap in the wall. Head out into the open and you are rewarded with +500 XP.Cenote
Turn right and jump towards the craggy wall across the chasm. Use the axe to climb around to the left and down. Jump over to the ledge on the left and perform a saving grab.
Traverse around the corners to the right, where you reach the next craggy wall. Rappel down and at the lower end perform a wall run to jump over to the horizontal bar on the right, which allows you to swing to the next craggy wall. Climb over to the left and rapple down, to where you can pick a perception plant. Step out onto the ledge protruding over the rapids. Jump ahead and use the grapple axe to swing to the next platform. Here's another perception plant for you. Step into the opening and from the jutting ledge jump towards the craggy wall of the pillar in the centre. Rappel down. At the lowest end of the rope let go to drop into the water.
Collect the medicine, focus and endurance plant, as well as the resource container with +15 XP on the ground.
Then, after catching your breath, dive into the opening.
In the next part you can collect one endurance and two focus plants.
Climb out onto the ledge. Vault up onto the next ledge and scramble up the wall to reach the uppermost ledge, where some feathers await you.
Follow the path on the right, ducking under the tree branch. Step out onto the jutting ledge on the right and use the rope slide.
Where you land, you will discover the base camp Cenote Vista (1/3) and earn +25 XP.
Step into the opening.
Document (1/6):
Just on the right side, after stepping through the arch, you can find the document Journal of T. Serrano 2 from the artifact collection "The Missionary" (2/8) lying on the ground. You are rewarded with +25 XP. , (map location) There is also some hardwood and a resource container with +15 XP in this entrance.
, (map location)
Scramble up the ornate wall and follow the path at the top. On the right you can examine an optional item.
Head down the path and you come by another resource container with +15 XP, and shortly after a perception plant.
Step close to the edge.
Dive into the Cenote
Perform a dive down into the cenote. Your bravery is rewarded with +50 XP. Be careful, the cenote houses piranhas.Challenge "Sunken Treasure" (1/5):
From where you land (looking into the direction of the temple entrance) dive down and find an underwater treasure chest sitting on the rock outcrop just under the surface a bit to the right. Use the axe to pry it open. It will contain some jade ore (2) and you are rewarded with +10 XP. , , (map location)
If you have trouble locating any of these chests, check out my .
Survival Cache (1/8):
Now dive straight down, slightly to the right of where the treasure chest was. Beware of the piranhas, when you hear the warning sound quickly hide behind the stone slab. On the way down you can spot a survival cache blinking occasionally. Dig it up to earn its contents and +25 XP.
(map location)
Relic (1/5):
Just to the left of where you dug up the cache, on the same stone slab, you can find a small box containing the relic Crucified Figure from the artifact collection "Homecoming" (3/6). You will obtain +25 XP and improve your knowledge of Mam. , , (map location) Just to the left of the relic, a little bit further down you can find a vein with jade ore.
, , (map location)
Challenge "Sunken Treasure" (2/5):
On a lower stone slab, just to the right of where the cache and the relic were, you can find another underwater treasure chest you can pry open using the axe. It again contains jade ore (2) and rewards you with +10 XP. , , (map location)
Challenge "Sunken Treasure" (3/5):
On the surface of the cenote, where the piranhas will mainly ignore you, swim in the direction of the rock sticking out of the water (south-west). On the way, shortly after the two waterfalls you can find a resource container with +15 XP on the outcrop just below the surface. There are also a variety of plants in the cenote, which I won't mention individually.
Continue to the log sticking out of the water. Dive down an pry open the underwater treasure chest at the foot of this log. You will receive the jade ore (2) inside, and +10 XP.
, (map location)
Survival Cache (2/8):
Continue swimming towards the southern end to the stretch of beach there where you can dig up the next survival cache for +25 XP. There is also a tree with hardwood nearby.
, (map location)
Challenge "Respected" (1/5):
Still on the stretch of sand look over to the right. Dangling from the tree above you can spot an effigy. Use a rope arrow to pull it down and earn +10 XP.
, , (map location)
Explorer Backpack (1/?):
Through the remains of the stone arch you will come to an Explorer Backpack.
It will add more survival caches to the map and reward you with +25 XP.
, (map location)
Swim over to the temple entrance.
Challenge "Sunken Treasure" (4/5):
In the shallow water just to the left of the stairs of the entrance, by a log lying in the water, you can find the next underwater treasure chest which will reward you with jade ore (2) and +10 XP.
, , (map location)
Challenge "Sunken Treasure" (5/5):
Swim over to the far right corner where you can find the final underwater treasure chest which will reward you with jade ore (2) and +100 XP for completing the challenge.
, (map location)
Archivist Map (1/?):
Turn around to face the remains of a bridge on pillars. Dive under it to collect a resource container with +15 XP. Then swim up to the surface while unter the roof and climb out into the corridor. Tear down the barrier using a rope arrow to reveal an Archivist Map in the alcove behind, for which you will obtain +25 XP.
, (map location)
Find the Silver Box of Ix Chel
Now swim to the temple entrance and enter. Dive down into the next passage where you can grab a focus plants on the way into a cave.Survival Cache (3/8):
Down on the left you can dig up another survival cache for +25 XP.
, (map location)
Resource:
Further right you can find some salvage under the beam of light and another resource container with +15 XP over to the left. But you probably need to catch your breath by now.
Quickly dive up into the opening on the left to find a large pocket of air.
Relic (2/5):
Just at the foot of this air hole you can find a small box with the relic Knight's Morion from the artifact collection "Gates of Hell" (1/7). It contains hidden information. You are rewarded with +25 XP
, , (map location)
Resource:
Climb out into the little cave above to grab some jade ore (+5) and examine an optional mural.
Dive down again and turn left to reach the trapped air.
Resource:
If you face back to the cave with the beams of light and the entrance (east), you can dive down into a trench in front of you. Here you can pry some jade ore (+5) from a vein in the wall, grab a resource container with +15 XP and pick medicine and finally an endurance plant when following the tunnel where there is also a pocket of trapped air.
Dive into the next cave. You would have also arrived here when diving west from the first pocket of trapped air.
This cave offers several more plants as well as another resource container with +15 XP near the lowest passage which is also the brightest.
Document (2/6):
But first dive into the darker passage to the right of it (north). The entrance is marked by a greenish focus plant. Swim to a surface to come to a small chamber with some jade ore (+5) and a document lying on the right side. It is A Warning from the artifact collection "Gates of Hell" (2/7).
, (map location)
Return to the previous underwater cave.
Now dive into the lower opening where the resource container was. Swim to the surface and exit the water.
Carefully approach the arch on the right. Use the knife to cut the rope and deactivate the spear trap.
Duck underneath. On the other side you can find an endurance plant. Step out onto the ledge where there is another endurance plant on the right side.
From the jutting ledge jump towards the ornate wall in front of you and immediately jump again to reach the ledge below the craggy wall. Jump up and attach the axe to climb up the craggy wall. From the top left end jump over to the ledge on the left. Traverse around to the left and there climb down the next bit of craggy wall. Rappel down and then swing to the far ledge in front of you. Jump over there and grab the ledge.
Pull up and collect the resource container with +15 XP on the right. Continue towards the crack in the wall and squeeze through.
Challenge Tomb (1/1) "San Cordoba": [youtubeplay]NrTYBkedl64[/youtubeplay]
The opening on the right will lead to the next challenge tomb, easily identifiable by the yellow-decorated skulls left and right of the entrance. Step inside. Jump across the chasm to reach the craggy wall where you attach the axe. Climb up to the top. Enter the next part of the cave.
Missing Gear: On the right you will need the shotgun to proceed, so ignore that bit.
Instead turn left and dive down into the passage. In the next cave catch your breath at the pocket of trapped air. Dive down to the left.
Use a rope arrow on the barrier on the left to leave the captain's cabin. Step outside and follow the planks around to the right. At the end jump down into the water. Swim to the shore and climb out. Follow the path all the way up, till you can squeeze through the gap in the wall again. Step out onto the ledge and jump down into the water. Swim over to the other side where you can leave the water on the right. Scramble up to the ledge on the left. Up the stairs you will come to a jutting wooden walkway. From here jump towards the craggy wall. Climb up and, on the right side, jump up to the ledge. Traverse to the right and from the end jump to the next ledge. Pull onto the ledge above you. Get to the back wall and scramble up. Use the axe on the craggy wall above to reach the top. Follow the tunnel and you will come to a slope that will send Lara down. At the end jump off and us the axe to grab hold of the craggy wall. Climb up and perform a wall scramble to get to the upper ledge. Here use the rope slide to get down onto the next platform. Step forward to the edge and jump ahead. Use the grapple axe to swing to the next craggy wall beyond the spike pit. A double jump will get you to the top. Use the jutting wooden plant to jump down into the pool. Dive down into the narrow tunnel. On the other side dive straight ahead to find a pocket of trapped air. You are back on familiar ground. Swim ahead and at the sunken boat, turn left. Keep straight and dive up. Pull out onto the ledge, where you can find some black powder. In the alcove at the back wall use the axe to pry through the rubble.
Survival Cache (4/8):
Shortly after passing the focus plant you will find a Survival Cache you can dig up in the middle of the cave. You will get +25 XP.
, (map location)
Swim over to the left where you can collect a crate with salvage. The air pocket beyond marks the exit and can be ignored for now. Swim down the northern tunnel, past a sunken wooden boat. Follow the bend around to the right. Take a deep breath at the pocket of trapped air before you continue. Careful, the next tunnel system is filled with moray eels.
Grab the salvage in front of you, then quickly hide in the sea grass on the left. Wait for the eel to swim by. Should any of the eels catch you, press the interact button repeatedly to fight it off, afterwards quickly catch your breath at an air pocket. You might notice the opening in the cliff wall above you. This is where we will come down after solving the tomb..
Just past the sea grass, on the left, you can pry some jade ore (+5) from the wall.
Resource:
Over in the right part of the tunnels you can find another pocket of trapped air and nearby a resource container with +15 XP and a focus plant close to the moray eel patrol route.
Dive into the tunnel over on the left and follow it till the current takes you away. You are dropped in another water cavern.
On the ground you can find one endurance and two perception plants.
Pull out onto the ledge left of the two smaller waterfalls. Scramble up the wall and use the axe to attach to the craggy wall. Climb up and traverse to the right end. From there jump over to the ledge further right, on the other side of the waterfall. Climb further to the right. Jump past the second waterfall and attach your axe to the craggy wall there. Climb up and scramble up the wall to reach the top ledge. Pull up and get into the narrow tunnel. You come out in another cenote cave. Jump down into the water.
Resource:
At the bottom of the pool you can find another salvage crate, a focus plant, an endurance plant and on the remains of a sunken bridge another resource container with +15 XP.
Swim to the shore on the right and pull out of the water to find the challenge tomb base camp Collapsed Temple.
Follow the walkway and jump to the upper ledge. Step into the tunnel on the right and squeeze through the gap.
Survival Cache (5/8):
Hop down the wall on the right to find the next survival cache in the corner there. Dig it up to obtain its contents and +25 XP. Climb back up onto the stairs.
, (map location)
Relic (3/5):
Now climb down on the left side where you will find a small box containing the Primitive Doll from the artifact collection "Handmade Dolls" (1/5). You will improve your knowledge of Mam and earn +25 XP. Further down you can pick up some black powder.
, (map location)
Resource:
At the bottom you can find a salvage crate on the left and some cloth on the right.
At the bottom of the stairs you will find a canon and a wooden cart. Stand on the right side of the wooden cart and push it into the alcove on the left. Now stand in front of the barrel of the cannon and push it down the hill. It will crash through the barrier. Follow it down into the large cavern where you will find a Spanish galleon.
Head down the wooden jetty.
Survival Cache (6/8):
Jump into the water and dive straight ahead. Here, near a sunken dinghy, you can dig up the next survival cache for +25 XP.
, (map location)
You can also find medicine and an endurance plant in this pool. Get back to the shore and climb out of the water.
Follow the path around to the left.
Resource:
Behind the canon on the right side, near some stairs leading to an archway lying in ruins, you can find some black powder and there is another focus plant in the water besides the ship.
Puzzle
Find the raft at the end of the stretch of beach and kick it into the water. Jump onto it and from there continue towards the crack in the hull that can serve as a handhold. Scramble up the hull to reach the small crack above and then climb to the top crack. Traverse to its left end where you jump towards the next crack further left. From here scramble up again and climb the final cracks to reach the deck. Grab the black powder, then get to the lower deck. Here use the capstan by turning it anti-clockwise. The boom will swing around, aligning the canon over the upper deck, just above a pile of wooden rubble that looks like it might be broken through.Relic (4/5):
Just to the left of the capstan you can walk the plank. Jump down into the water. Under water you can find a focus plant, an endurance plant and over to the left, just below the flotsam, a small chest containing the Rusty Sword from the artifact collection "Conquerors" (4/8). You obtain +25 XP. It contains hidden information, so turn it to inspect the notches on the blade. Return to the surface and swim to the rock below the rope ladder leading back up onto the deck. Climb back up, jumping the last bit.
, , (map location)
Now hop into the water where the cargo hold has once been. Below the surface, in the corner on the left, you can find a resource container with +15 XP.
Then dive to the metal door on the right and pry it open using the axe. Dive through the passage and resurface on the other side.
Climb out of the water on the left side.
On the left you can find another resource container with +15 XP and one ledge further up a crate with cloth.
Follow the upper ledge to the right. Scramble up the wall to reach the crack. Scramble up again to reach the slightly bend boards of the hull. Climb over to the left end and jump towards the horizontal bar. From here swing to the wooden boards at the wall and quickly jump again to reach the top ledge. The capstan here is blocked, so you might as well ignore it for now.
Instead walk out onto the remains of a broken mast to the left. From the end jump into the direction of the craggy wall and use the grapple axe to climb up. At the top follow the ledge to the left. Collect the salvage in the tunnel before you step out onto the jutting ledge on the left. From here jump towards the boom leading to the fore-mast. Balance across it to reach the mast.
Use the axe on the winch there to loosen the boom, which will swing around.
Scramble up the board leaning against the mast to reach the rope ladder. Climb up onto the boom.
Resource:
Jump up to the remains of the next rope ladder. Climb up to collect more salvage. Then climb back down to the boom.
Balance out onto the boom to the left (north) to reach the cliff wall again, this time on a higher level.
Jump over, perform a saving grab and pull up.
Resource:
Just at the back you will find a resource container with +15 XP. Enter the passage on the left to find a crate with salvage and a pile of jade ore (+5). Leave the alcove again.
Follow the ledge down to the right. From the end jump towards the craggy wall and grab hold using the axe.
Rappel down and turn to face the boom. Swing over there and jump towards it. Cross the platform and hop down on the other side to land at the capstan. Turn it clockwise to swing the boom out towards the crate.
Round the main-mast on the left and take the gangplank to reach a crate. Climb onto it and from there jump towards the boom. Balance out onto it and at the end jump towards the dangling crate. From here jump towards the rungs on the mizzen-mast. Climb up and over to the right to use the "San Cordoba" sign as a foothold. Jump up to the rope ladder above you. On the next platform you will find another winch which can be loosened using the axe. This will release the canon at the end of the boom and send it crashing down into the captain's cabin.
Standing underneath the rope coil, tether it to the coil at the aft of the ship. Slide down. Drop down into the captain's cabin.
Document (3/6):
Below the rubble, over on the right you can find a document titled Captain's Note from the collection "Conquerors" (5/8). You're rewarded with +25 XP.
, (map location)
Examine the Tomb Stele. You will obtain the skill Caiman's Breath II.
Left and right of the stele you can pick up piles of Gold Ore (+6 each).Use a rope arrow on the barrier on the left to leave the captain's cabin. Step outside and follow the planks around to the right. At the end jump down into the water. Swim to the shore and climb out. Follow the path all the way up, till you can squeeze through the gap in the wall again. Step out onto the ledge and jump down into the water. Swim over to the other side where you can leave the water on the right. Scramble up to the ledge on the left. Up the stairs you will come to a jutting wooden walkway. From here jump towards the craggy wall. Climb up and, on the right side, jump up to the ledge. Traverse to the right and from the end jump to the next ledge. Pull onto the ledge above you. Get to the back wall and scramble up. Use the axe on the craggy wall above to reach the top. Follow the tunnel and you will come to a slope that will send Lara down. At the end jump off and us the axe to grab hold of the craggy wall. Climb up and perform a wall scramble to get to the upper ledge. Here use the rope slide to get down onto the next platform. Step forward to the edge and jump ahead. Use the grapple axe to swing to the next craggy wall beyond the spike pit. A double jump will get you to the top. Use the jutting wooden plant to jump down into the pool. Dive down into the narrow tunnel. On the other side dive straight ahead to find a pocket of trapped air. You are back on familiar ground. Swim ahead and at the sunken boat, turn left. Keep straight and dive up. Pull out onto the ledge, where you can find some black powder. In the alcove at the back wall use the axe to pry through the rubble.
Document (4/6):
Just in front of you you can find the document Journal of T. Serrano 5 from the set "Gates of Hell" (3/7). You are rewarded with +25 XP.
, , (map location)
Jump towards the ledges on the wall. Climb over to the left where you can pull up onto the narrow ledge. Walk to the left end, lean out and jump to the craggy wall, where you attach the axe. Rappel down till you are level with the next craggy wall on the left. Wall run along the wall and jump off to the left to grab the wall with the axe. Climb over to the left and up. Scramble up the wall to reach the ledge. Climb over to the left end. Double jump up to the craggy wall above you and scale it and at the upper end scramble up again to reach the top.
Run to the wall at the back and perform another double jump to reach the ledge. Climb to the right end, where you can climb up.
Run ahead to find a Trinity mercenary strung up. Cut the rope to cut him down and obtain the Bishop 600 shotgun and +100 XP.
Make your way to the base camp Cenote Temple Ruins (2/3) and earn another +25 XP for discovering it. If you have any skill points to spare, I suggest you invest it in "Puma's Feint" if possible, as that skill might come in handy soon.
To the right side of the camp you can find a salvage crate.
Challenge "Respected" (2/5):
Turn around to face the arch where the Trinity mercenary was. On the left side of the arch you can spot the next effigy. Use a rope arrow to pull it down and earn +10 XP.
, , (map location)
Now use the shotgun on the shotgun barrier at the end to destroy it. Squeeze through the crack in the wall.
Here you can collect another resource container with +15 XP on the right and some black powder over on the left.
Follow the tunnel and squeeze into the opening. On the other end you will see a creature moving over to the left. Follow it. Before you reach the end you will be attacked by a Yaaxil and be pushed down into a fighting pit.
Survive the Ambush
Fight of the Yaaxil. The shotgun is a good weapon for the close combat you will be engaged in. Hopefully you have unlocked the skill "Puma's Feint" and can perform counter-attacks after dodging. Even if not, dodging is still very helpful when trying to avoid damage. Remember: To dodge press the roll button (PC: C, PS: circle, Xbox: B) when being attacked. After the first wave has been fought off, more enemies appear up on the left and the right. You can shoot the explosive vases for a quicker result. The third wave will give you some time to loot killed enemies and collect ammunition lying around.After the fight find the wall in the south-west where you can scramble up to reach the top. Climb up onto the next ledge.
Find the Silver Box of Ix Chel
Follow the path up, till you reach the cave where you have to wade through water.Challenge "Respected" (3/5):
To the right of the opening you can find another effigy to rope-pull down for +10 XP. Additionally you can find an endurance plant over on the right.
, , (map location)
Wade through the tunnel while a couple of Yaaxil pass overhead.
You come out in a water chamber with a mini puzzle.
Dive down to the pry barrier blocking the water wheel. Use the axe to pry the rubble loose. Then swim up to the surface and exit the water to the right where you can collect a resource container with +15 XP.
Relic (5/5):
Head up the few steps to find another pry barrier on the right. Break through it to enter the chamber behind. On a stone slab on the right you will find a small box containing the relic Brigittine Rosary from the artifact collection "The Missionary" (3/8) for which you will earn +25 XP. It contains hidden information. Zoom in on the cross to find it. Leave the chamber again.
, , (map location)
Mini Puzzle
Stand at the rope coil by the winch and tether it to the rope coil of the water wheel. Then stand at the crank and turn it clockwise till the opening will allow you to dive through. You are rewarded with +50 XP.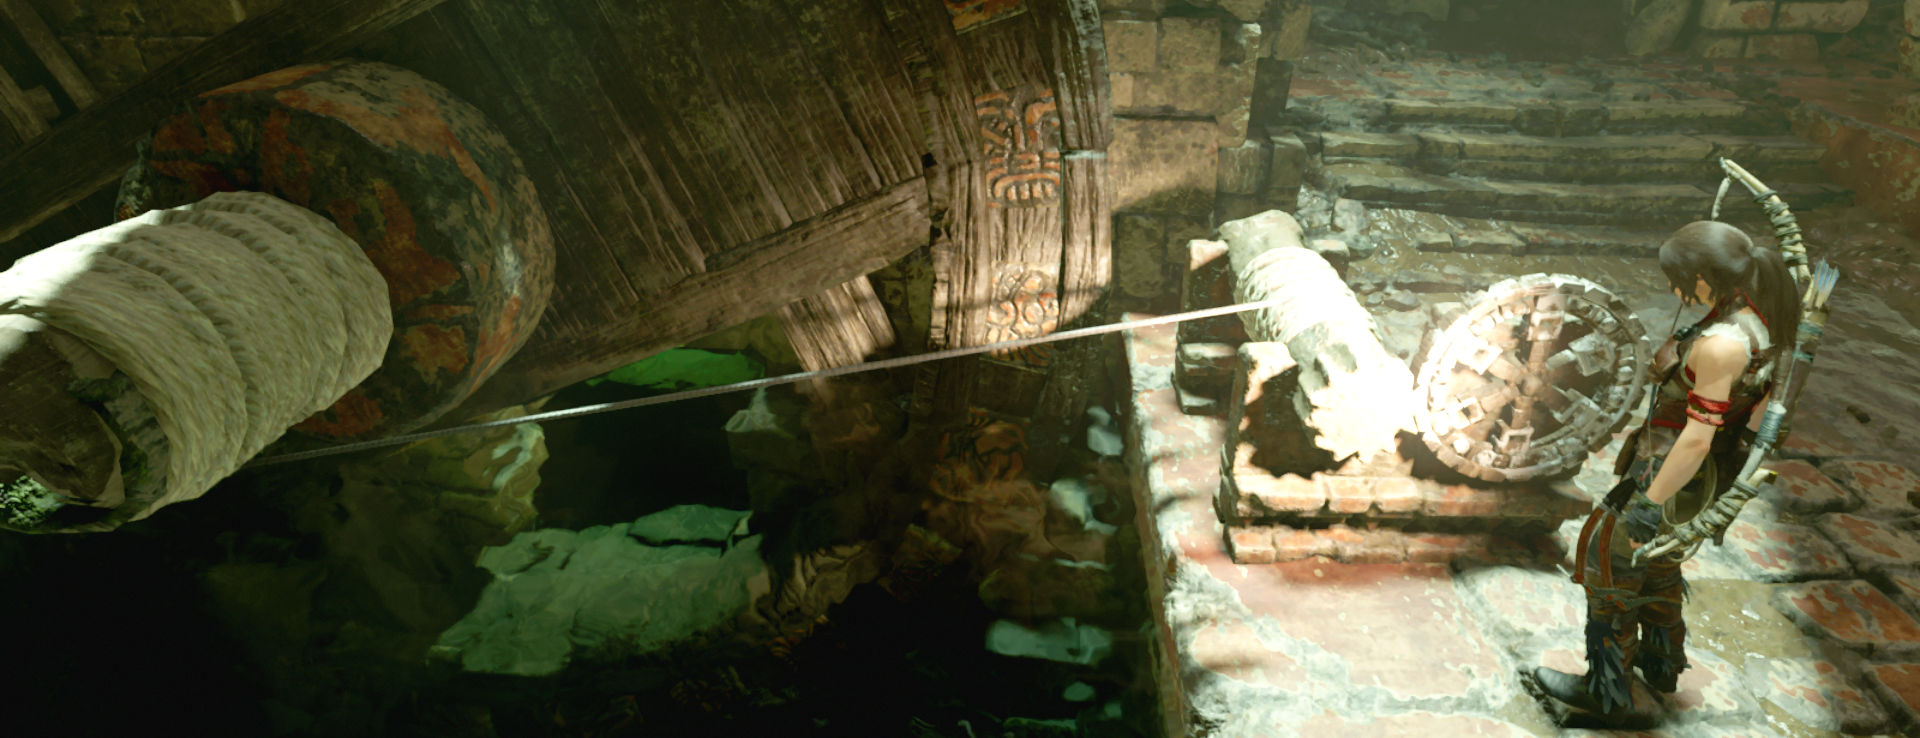 Water Wheel Alignment
Survival Cache (7/8):
There is another cache and some resources to find in this underwater tunnels, however you might need to catch your breath first. If you do, swim ahead and up to the surface.
Then turn around and dive down again.
On the upper ledge, over in the left corner, you can find a resource container with +15 XP.
Further down, on the right wall you can pry some gold ore (+6) from a vein in the wall.
On the left side you can dive into a small cave alcove where you can dig up the next survival cache and earn +25 XP.
, (map location)
Up on the ledge above where the cache was you can pick a focus plant.
And finally, beyond it you can find a crate with salvage down on the right.
Surface and swim to the entrance on the left.
Follow the stairs up. Be careful not to step into the tripwire. Cut it to disarm the spear trap. Roll through underneath to reach the other side. When you run over to the left you will be attacked by a single Yaaxil. Finish him quickly using the shotgun.
Step towards the edge.
Document (5/6):
On the left side you will find a document lying on the ground. It is Journal of T. Serrano 7 from the set "Gates of Hell" (4/7).
You are rewarded with +25 XP.
, (map location)
Stand at the right end of the edge and look to the craggy wall over on the right. Jump there and grab hold with the axe. Rappel down and at the bottom part of the wall perform a wall run. Jump off over to the ledge on the left.
Document (6/6):
On a rock to the left you can find the final document of the location. It is Journal of T. Serrano 6 from the set "Gates of Hell" (5/7) and rewards you with +25 XP.
, , (map location)
Enter the tunnel, picking up the resource container with +15 XP on the left.
At the end jump towards the craggy wall and again rappel down. At the bottom Lara will automatically release the rope and drop into the water.
Open the Gate
Resource:
On the ground below you is another resource container with +15 XP and over to the left you can find an endurance plant.
Further along, also on the ground, behind the large log, you can find a crate with salvage.
Past the wheels, over on the left in an alcove is another resource container with +15 XP.
Right Side
Swim to the back and over to the right, where another resource container with +15 XP can be found on the ground below. Climb out onto the ledge where you can grab some cloth, an endurance plant and some medicine. A Yaaxil will attack you from the chamber.🔧
Survival Cache (8/8):
But before you enter turn around. Jump over to the wooden ledge and jump again to reach the other side. Run through the stone arch underneath the bridge leading up to the gate. Here you can dig up the final survival cache of the location and earn +25 XP for it. Now jump back to the wooden platform and return to the other side.
, , (map location)
Challenge "Respected" (4/5):
On the left wall you will find the next effigy you can rope-pull down to earn +10 XP.
, , (map location)
Step through to the right, weapon at the ready for the next Yaaxil attack. One will break through the wall on the left, the second will come down the stairs in front of you.
Step outside and use a rope arrow to tear down the barrier in the water to your right, just in case.
Resource:
Then dive into the pool where you will find a focus plant, medicine and a resource container with +15 XP. Return to the shore.
Head up the stairs and search the area for ammunition. Occasionally the next Yaaxil may appear now from an opening in the walkway at the side, or he may wait for you to perform another action.
Stand by the winch and more importantly the rope coil and tether it to the middle of the three snake spigots. Now stand at the crank and turn it anti-clockwise to make the spigot face the wooden walkway on the right. Make your way up there and from the end jump towards the spigot. Pull up and climb onto the platform on the right.
Use the axe to tear down the pry barricade blocking the top spigot.
Kill the attacking Yaaxil.
Resource:
If you follow the path up here to the end, you can find another resource container with +15 XP.
Get back down to the winch using the rope slide.
Tether the winch to the top spigot and turn the crank anti-clockwise twill the stream of water is directed to the middle spigot.
Then tether the winch to the middle spigot again and turn the crank clockwise to make it point to the left and direct the water flow to the lowest spigot.
And, finally, tether the winch to the lowest spigot, on the left and then use the crank, turning it clockwise to direct the water flow to the water wheel. The first portal gate opens.
You will be attacked by a group of Yaaxil. First finish the three coming down to you. Then take cover behind the pillar and shoot the one at the spigots with bow and arrow. There is also one up on the right side.
Left Side
Jump down into the water and swim over to the rotating waterwheel. Turn to face the wheel attached to it on the left side. Dive down and through the opening in the wheel at the opportune moment, when it is at the bottom. Dive out on the left side to reach the next water channel.Resource:
Turn right and dive down underneath the wheel on the right, where you will find a resource container with +15 XP.
Continue past the two wheels, where you will find an endurance and two focus plants.
In the far left corner, below the ruins, you can pick up another resource container with +15 XP,
Swim in the other direction. Under water on the left, just past the spot where you entered, you can find a pry barrier. Tear it down to reveal a chamber with another resource container with +15 XP,
At the left (northern) end you can climb out of the water. Tear down the barrier to the left for later.
Challenge "Respected" (5/5):
Climb up onto the ledge with the stairs on the left.
To the right of the opening you will find the final effigy for the challenge "Respected". You earn +100 XP for completing the challenge.
, , (map location)
Before you continue, grab the resource container with +15 XP from inside the chamber behind the effigy.
Now make your way up the right ledge and climb further up on the right to arrive at another rope winch. Here you will be attacked by two more Yaaxil up by the waterfall streaming out of the statue's mouth. Duck behind a column and take them out with headshots with the bow.
When getting over to the ammunition on the left, two more Yaaxil will attack, forcing you into close combat. Use the shotgun or melee counters.
Stand by the rope winch here and tether it to the upper of the two snake spigots. Turn the crank clockwise till the spigot fills the pool below your platform. Dive into the water and pry away the barricade blocking the lower of the spigots. Then climb out at the raft and return up the hill to the rope winch, after grabbing the ammunition on the right.
You will have to fight off three more Yaaxil coming down to you, then another one up on a ledge at the back wall and one up above the spigots before two more engage in close combat.
After the fight, with the winch still tethered to the upper of the two spigots, turn it anti-clockwise to direct the water to the lower spigot.
Then tether the winch to the lower spigot and turn it clockwise to set the water wheel in motion.
The large gate opens. Lara steps through. The queen of the Yaaxil appears behind her, but they do not follow her in. Lara finds that the silver box is gone.
© www.tombraidergirl.com Personal use only, no reproduction. Last changes: 24 Mar 2024, 16:00